Touring in a splitter van:
An introduction for those embarking on a tour of the UK and Europe
This guide has been written by Neon Street touring. Providers of Splitter vans and merchandise in the UK and Europe. After 20 years of tours, we have seen some excellent work, and we have seen some disasters. This is a little guide we will keep updated with the aim to help those starting out so you can have more excellent tours and ideally no disasters!
It is by no means a complete bible for touring, but it should help you get going.
You may be in a position where a car is not enough to fit you, your kit or fellow musicians in when touring. You may need a splitter van.
These are people carrying vans of up to 9 seats (including the driver) with a bulkhead (for safety) behind which you can put all your musical equipment. They are usually fitted with trackers, and deadlocks for better security than your car too!
They are one of the largest vehicles you can drive on a standard UK/EU license.
They look like this
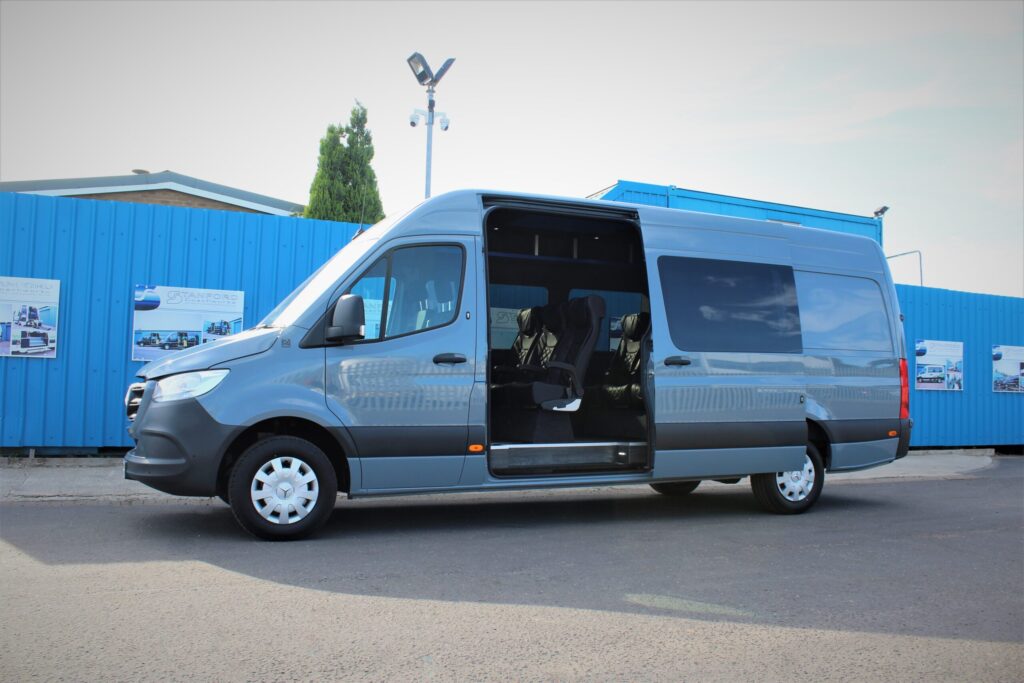
There are many companies in the UK you can hire these (self-drive hire) from with prices ranging from £120 – £250 per day plus VAT depending on your needs and duration of hire. Do shop around and think about what you need vs what you want.
Below we have put together some key things to consider when going on tour in a splitter – financial / safety and social. There are lots of variables so making the right choices for you is important.
Self Drive Vs Owner Driver – One you drive yourself (and pay to hire the van) the other is someone who owns the van becomes your driver for the tour. There are markets for both. Whichever you choose make sure you check that they are both insured correctly and taxed appropriately, and you are clear on where liability rests with damage / potential breakdowns etc.
Size – These are one of the biggest things you can drive on a standard license – then can be 6-7 meters long, up to 3meters high and wider than a car. If you have not driven one before then try to get some practice or shadow someone who has driven one before.
Do consider the size when planning your tour as they won’t fit in multi-story car parks and some surface car parks will have height and size restrictions.
Weight – A van is limited by its payload (the amount of weight you are allowed to carry). If it fits in a van, it doesn’t mean the van has the legal weight capacity to carry it.
Most splitter vans have a gross weight of 3.5ton GVW (the maximin weight they can be on the road).
What you need to be aware of is the payload (the amount of weight you can put in it – people, kit etc.)
Payload is the difference between the vehicles empty weight and the gross vehicle weight. If the van has a GVW of 3.5ton but it weighs 2.8 ton empty then your payload is 700 kilos… that’s what you can out in it. People and kit.
It’s good practice to keep a record of all your kit including it’s sizes, serial numbers and weight etc. this is good for touring in vans, flying to shows and helps if the worst happens and your equipment is stolen.
So realy think.. do you need it?
Security:
Your instruments and tools will be in the vehicle for a long time. So, make sure you are happy with the security. Most splitter vans will be fitted with deadlocks on all doors (these are additional locks fitted to the van as a physical bolt to reduce attempted theft).
They should have trackers in case the worst happens and ideally, they should have dashcams to support you in case of any accident.
Fuel:
A splitter van can average around 20-30mpg. It varies depending on how you drive, how heavy you are, and the make, model and age. So double check with the provider to help with your budget. But regardless – always allow plenty of buffer for fuel as you will likely spend more than you think (sadly).
AdBlue:
Vans newer than 2016 will require AdBlue – this is an additive which reduces the emissions coming out the exhaust. It goes in the engine bay or in a separate filler hole by the fuel tank depending on the van – This can be around £15-£30 for 10 litres so budget for a little bit of this unless you are told otherwise by the hire company.
Electric tour vans/ splitters:
They are not a thing yet as electric vans don’t have the payload of the battery capacity to make touring viable. But maybe in the future.
Driving hours:
Driving a van can be hard work physically and mentally. Sharing a drive with others is the safest option for everyone. Make sure you plan rest stops on your route aswell. Don’t just assume the google/apple route time is accurate – allow for traffic, stops and also that your speed in a van is limited compared to a car – this will also lengthen your journey. Allow enough buffer to get to your show safely.
Low Emission Zones / Congestion Charges
Several major European cities have introduced schemes to reduce emissions and traffic congestion. Ignoring these can lead to hefty fines.
In the UK, particularly London:
- ULEZ (Ultra Low Emission Zone): London’s ULEZ covers almost all of Greater London. If your splitter van doesn’t meet specific Euro emission standards (Euro 6 for diesel), you’ll need to pay a daily charge of £12.50. You can check if your vehicle is compliant on the Transport for London (TfL) website. The charge applies midnight to midnight, every day except Christmas Day.
- Congestion Charge: This applies to central London. The daily charge is £15 if paid in advance or on the same day, increasing to £17.50 if paid by midnight of the third day after travel. It operates 7am-6pm Monday-Friday and 12pm-6pm Saturday-Sunday and bank holidays (no charge between Christmas Day and New Year’s Day bank holiday). Some splitter vans have exemption certificates – check this as it can save tyou a lot of money over a tour.
- Check vehicle compliance: Before hiring, confirm the Euro emission standard of your splitter van and how many low emission zones you will pass through on your tour.
- Pay in advance/on time: Use the TfL website or app to pay these charges promptly to avoid penalties.
- Across Europe: Many other European cities have similar Low Emission Zones (LEZs) or environmental zones. Research your specific destinations thoroughly before you travel. Look for information on local city council websites or use apps that map these zones.
Tolls – Not so much in the UK but there are plenty in Europe so make sure you consider this in your budget. Some countries use vignettes (stickers for a set period), others have direct payment with physical barriers to get on and off the roads. Most accept card but having some cash is useful in case of card failure.
Carnets: For going in and out of Europe/UK with equipment
Post-Brexit, taking professional musical instruments and equipment from the UK into the EU for temporary use (like touring) can require an ATA Carnet. While there’s some government guidance suggesting accompanied instruments in personal baggage might avoid the need for a carnet, for a band with a splitter van full of gear, an ATA Carnet is highly recommended to simplify customs procedures and avoid paying duties or taxes.
- What is a Carnet? An ATA Carnet acts as a “passport for goods.” It’s an internationally recognised customs document that allows the temporary, duty-free, and tax-free import and export of goods for up to one year. It replaces the need for customs declarations and provides a financial guarantee for customs charges.
- When you need one: If your instruments and equipment are considered “professional equipment” and are leaving the UK for temporary use in the EU (and other participating countries), a carnet is generally advisable.
- How to get one: Carnets are issued by the London Chamber of Commerce and Industry (LCCI) and other local Chambers of Commerce in the UK. If you are still not sure then we suggest speaking to Rog at https://www.tourbloke.com/ who has been supporting artists for years with carnets.
- Costs: There’s an issuing fee (around £350-£450 + VAT) and a security deposit. The security deposit is based on the value of your equipment (often 30-40% of the total value) and acts as a guarantee that you’ll bring the goods back. This deposit can be a banker’s draft, bank guarantee, or an in-house security scheme.
- Stamping: You must get your carnet stamped by customs officials upon entry and exit of each country for which the carnet has been issued (e.g., leaving UK, entering France, leaving France, entering UK). Failure to do so can result in duties, taxes, or even seizure of your equipment.
- Detailed list: The carnet requires a detailed list of all items, including serial numbers, weight, country of origin etc.Keep this accurate and up-to-date.
- Don’t skip it: While some musicians risk it for smaller trips, for a band touring seriously, a carnet offers peace of mind and avoids potentially disastrous customs delays or charges.
- Apply well in advance: The process takes time.
- Understand the stamping process: It’s critical to get the carnet stamped correctly at every border crossing otherwise it can stop you from travelling which can impact on your shows.
Merchandise in your splitter
An essential revenue stream for the tour. Remember it adds to your weight which could be an issue for you. Consider drop shipping stock to venues along the tour to keep your weight down. Then you take the remainder plus told (card machine, price list, display etc) in the van only. Neon Street does offer this service plus card machines and display kit.
When taking merchandise to Europe from the UK you need to be aware that you need to export and import formally. If you don’t have a export agent then it may be easier to ship to the EU un advance or produce merchandise in the EU and have it shipped there in advance.
If you need a producer in the EU we an suggest: https://banzai-creative.nl/ who we have used many times.
Summary:
Good planning makes things so much smoother and easier on the pocket. Talk to hire companies / owner drivers in advance, get quotes in writing. Make it clear on your plans so they can support you. The closer you get to your tour the less flexible people can be as other jobs are working alongside yours.